Showing posts with label scraps. Show all posts

Saturday, April 7, 2012

Cajun Corner - Vol. 4, No. 13


Cajun Corner – Vol. 4, No. 13 – April 7, 2012


Bon Jour!  Welcome to Cajun Stitchery’s weekly email and welcome to our family.


ΘΘΘΘΘ

Don’t forget to visit our blog at www.cajunstitchery.blogspot.com, and www.cajunstitchery.etsy.com often.   We are also on Twitter and Facebook. 

Visit our on-line catalogs at:


This week I’ve been able to do a bit of catch up work and try out some techniques that have intrigued me.

The first technique was embroidering scalloped edges on a tee shirt.  Using the appliqué technique, I digitized a simple scalloped placement line, then a tack down line, then the satin stitch.  After sewing the tack down line, I was able to trim the excess fabric as in appliqué.  When the satin stitch sewed out the fabric was trimmed and left a very nice scalloped edge.  I used a tear away stabilizer.  The only problem with the tear away stabilizer is that when you tear it away some fuzzy cotton residue remains.  That’s not so bad if you are embroidering with white thread, but the darker the thread the more obvious the fuzz.  There are a couple of ways to deal with the fuzz.  One is to trim the fuzz that you can and then using a magic marker the same color as the thread, cover the fuzz with the magic marker.  Another method is to singe it off, but only if your thread is a poly-type threads that will melt.  The final method is to just leave it.  Most people won’t even notice.  Another technique is to hoop plastic or wash away, instead of the tear away.  It was my tee shirt and I used tear away, trimmed away any noticeable fuzz and let it go.  It looked good enough for me.

Next, I wanted to begin practicing some continuous hooping a/k/a multi-hooping.  This is where you embroider a design that is larger than your hoop.  After embroidering the design in the hoop; un-hoop and re-hoop the design in such a way that the embroidery will begin in the new hoop where the previous embroidery stopped.  I used the scalloped edges of the previously mentioned tee shirt.  Paying close attention to where the first stitch is placed and pinning the fabric in place, the continuous/multi hooping project proceeded without a hitch.  The end of the multi-hooping, when doing a continuous hooping that meets at the other side, i.e., table cloth edging or scalloped edges on a tee shirt, should match perfectly with the beginning.  In other words, the last stitch of the last hooping should meet with the first stitch of the first hooping.  Alas, mine did not.  The tee shirt was very stretchy and I ended up with a space of about one scallop, which I kind of slid into place.  That is not the most professional method but it worked in a pinch.

The scalloped edged continuous hooping was very simplistic.  This technique can become quite arduous with more complicated designs.  Therefore, I need to practice, practice, and practice.

My mama loved scalloped edges.  She thought they were very feminine and had a professional look.  Hand embroidered scallops require drawing and cutting the scallops; then sewing a running stitch near the depth of the scallop satin stitch; and finally, tightly and evenly sewing the satin stitch along the edge.  That is much too time consuming for me.  On a sewing machine there are a couple of techniques.  One is just like the hand embroidered satin stitch, except you use a tear away or wash away stabilizer after the edges are cut.  Good luck getting those to look right.  The simpler way is not to cut the fabric but sew the scallops and come back and trim the excess fabric from the scalloped edges.  This is especially nice if you have a scallop stitch on your sewing machine.  But you have to be very careful not to accidentally clip a satin stitch.  This method is used frequently on items at stores.  The embroidery machine method, explained above, gives the best of both worlds.  The end result is a satin stitched scallop without the clipped fabric showing and no snipped stitches.  Of course, scalloped edges can be done easily on a sewing machine by using a facing, but that isn’t embroidery and embroidery is what I do.

Scallops are not the only thing done this week.  We had an accident at the house.  One of the burners on the stove was left on and a pot holder somehow was on the burner.  The pot holder burned.  Don’t worry.  There was no damage other than a ruined pot holder.  The pot holder is one that I made several years ago and was our favorite.  Pot holders were probably the first thing that Mama taught me to sew.  They are a great way to use scrap fabric.  The nice thing about making pot holders is that they are not as thin and flimsy as most store bought pot holders, and they are large enough to be useful.  The ITH (In The Hoop) designs for pot holders all seem to be too small and too flimsy.  Awhile back I did design and made some pot holders ITH but they were not exactly what I wanted.

BASIC POT HOLDER

1.      Find the fabric you want to use for the pot holder.

2.      Embroider the design you want on ½ the fabric for the pot holder.

3.      Cut the fabric, leaving enough around the edges for your seam.  This step can also be done before the embroidery process as long as you have enough fabric to hoop.  I cut mine on a fold.  I like a pot holder about 6” wide and 8” tall.

4.      With right sides together, sew a seam around 3 sides, leaving one side open for stuffing.  Turn.

5.      Take some scrap fabric, or whatever you want to use for stuffing, and place inside the pouch.  Lay the pouch down and spread the stuffing evening throughout the pouch.  Do not fill tight, just enough to give a nice, thick, quilted pot holder.

6.      Turn the open end inside and pin closed.

7.      Run your sewing machine over the entire pouch a few times, creating the quilting and sew the end closed.

8.      Trim your threads and voila!  You have a pot holder. 

Of course, this pot holder is very simple.  There are all kinds of pot holders and designs for pot holders.  Mama always taught me to save scraps of fabric and keep a bag by my machine for the trimmed off thread and little bits of fabric and lace.  These come in very handy on many sewing occasions.  I’ve been teased a lot about saving all of my scraps but when I was making those little letter pillows to spell “Cajun Stitchery”, those scraps came in very handy.  When making Evie a soft pillow those scraps came in handy.  There are numerous uses for scraps.

Our new puppy, Sammy, is acclimating to life at our home.  We searched online about how to introduce a puppy to an older dog and found several articles.  Basically, you just let them alone and they will handle it.  Make sure the older dog gets lots of petting and attention.  One article specifically addressed a male and female dog and said, “The bottom line is that the bitch rules.”  It is obvious that Evie rules in this situation.  However, I liked the sentence so much that I told George it is now my mantra.

Tonight George and I continue our tradition of Easter Egg Dying. 

HAPPY EASTER

If you are not a subscriber and would like to receive Cajun Corner weekly, please email cajunstitchery@yahoo.com and let me know to put you on our email list. 

========================================================

A little shimmer never hurt anyone! Add some metallic or glitter stripes you your Easter eggs to give them a super glam look! Easter just got super stylish!

Found this at:  http://www.ehow.com/how_2126489_make-homemade-easter-egg-dye.html


HOW TO MAKE HOME MADE EASTER EGG DYE


Instructions


  1.  

o                                1

Add vinegar as a mordant. A mordant prepares the fiber to accept and hold the dye. Vinegar is safe to use on eggs because it can be ingested. You need 1 to 2 Tablespoons per batch of dye that you make.

o                                2

Make homemade dye with produce or pantry items. The outer layers of an onion make brown dye, spinach or dandelion leaves make green dye and celery seed, ground turmeric or orange peels make yellow dye. Use crushed blueberries to make blue dye, crush cranberries or raspberries to make red dye and beet juice or chopped rhubarb to make pink dye. Put enough water to cover eggs, produce or pantry item and vinegar in a saucepan and bring to a boil. Reduce heat and simmer for 10 to 15 minutes.

o                

o                                3

Use drinks to dye your Easter eggs. Add vinegar and hard boiled eggs to coffee or tea to dye them brown. You can make unsweetened Kool Aid into dye. Or you could use vibrant juices like grape juice or cranberry juice.

o                                4

Mix food coloring for dye. Add 20 to 40 drops of food coloring to a cup of water and vinegar. The amount of food coloring determines the shade of the color. You can mix different amounts two or more colors to create a variety of shades.

Tips & Warnings


·         Use gloves to prevent your hands and fingers absorbing your homemade dye.
·         Put newspaper under the area where you are dying Easter eggs to protect surfaces from dye.
·         Always allow your eggs to boil and then simmer for at least eight minutes.

=================================================================

C’est tout, mes amis


Peggy Henshall

Cajun Stitchery

(850) 261-2462


P.S.  You are always welcome to stop by and look at all of the catalogs and pass some time with me, cher.

Tuesday, July 26, 2011

In-The-Hoop Pot Holders


It dawned on me recently that our annual Arts & Wine Festival on the beach is just a few months away.  It is usually the first weekend in October.  I found some tutorials on making potholders in-the-hoop but they just don't seem big enough.  I'm on a quest for the perfect embroidered potholder done completely in-the-hoop.

Potholders were probably the very first item that Mama taught me to sew when I was a little girl.  She would lay a piece of fabric down and then we would use our scrap material, neatly layered over the fabric until we felt it was thick enough.  Finally, we would lay another piece of fabric on top of the layers and start machine quilting.  Anything is fine.  The point is to sew around to hold all of those little scrap pieces in place.  We would sew straight lines across, usually at one inch intervals; then up and down.  After the quilting was done, we trimmed the edges to make them straight, sewed around the edges and finally, add bias tape around the edges.  Potholders are great beginner projects for children.

A few decades down the road from those early days and I'm still making potholders.  The embroidery machine is funny about how many layers of fabric it will stitch.  I am working on that.  I started off hooping some plastic.  The heavy plastic is sturdy and after the satin stitches are applied, you can pull the item away from the plastic with a clean edge.  I sew a single stitch line around the shape of the potholder.  Then I apply 2 layers of fabric.  Put that back in the machine and sew another line around the shape.  Take the hoop off the machine and trim the excess fabric.  This is just like an applique.  Then put the hoop back into the machine and stitch the middle design.  Depending on the size of the middle design, you may want additional quilting.  This is the time to stitch the stipple.  Then take the hoop off the machine and add a couple of layers of fabric to the bottom.  I just pin the fabric to the plastic but make sure the pins are far away from the path of the needle.  Put the hoop back in the machine and sew another outline.  Take the hoop out and trim the edges.  Then I take 2 pieces of fabric, folded in half and pin them so that the folded edges meet in the middle on the back of the potholder.  Pin in place and sew another outline and trim.  Finish with your satin stitch.  The reason for the folded pieces is to put your hand inside, creating a mitt.


Yep, that's a lot of trimming and putting the hoop in and out of the machine.  You can save time and effort by not doing the "mitt" and just pin all of your layers of fabric on the bottom before the quilting and let the machine run to the end.  I'm still working on more layers of fabric.  Yes, I know I could and should probably use batting.  In fact, the machine doesn't have a problem with batting at all and I would get the thickness much easier.  Let's face it, I'm stubborn and I want to use up that scrap fabric.  Anyway, I'm still perfecting the process and hope to have lots of beautiful potholders on sale at the Arts & Wine Festival this year.

C'est tout, mes amis

Friday, August 27, 2010

Cajun Corner Vol. 2, No. 33

Cajun Corner – Vol. 2, No. 33 – August 27, 2010


Bon Jour! Welcome to Cajun Stitchery’s weekly email and welcome to our family.

ΘΘΘΘΘ

Don’t forget to visit our catalog at www.companycasuals.com/cajunstitchery and www.cajunstitchery.etsy.com often.

Splash Party was a huge success!! Did it rain? Oh, yes, it rained. The place was packed and we all had a wonderful time. Grown men and women were acting like children. Can you even imagine what it would have been like if the sun was shining and there was no rain? We still have some caps available for sale. We sold out of the pink visors. If the sun had been shining, I’m sure we would have sold out of all the caps and visors.

I just cannot get over how fast this week has flown by. I totally missed posting on the blog for Wednesday.

The next big event for Cajun Stitchery is the Pensacola Beach Arts & Wine Festival the first weekend in October. Yes, we have registered and will be in the Paddy O’Leary’s parking lot next to the SOB’s booth. Just like last year. I’ve been spending a lot of time upstairs in my Crafting Department this week. If a messy desk is a sign of genius, I’m there. What a mess! I’m sitting at the big computer, the desktop with my trusty Doris the Singer. An L is formed with my regular sewing machine and serger. Then a U is formed with the portable cutting table that George made me. Then an O is formed with my bookcase. Yep, I sure did seal myself up in this thing.

The Crafting Department, which used to be known as our study, has a great view of the park across the street through our sliding glass doors. I love to open the blinds and just watch the people walking and kids playing. Someday I would love to see a craft festival in that park. Every one of our neighbors seems to have such special gifts to offer. This is a quaint neighborhood, very eclectic with wonderful neighbors. We have gardeners, chefs, hairdressers, teachers, caregivers, military and civilian, and a whole array of gifted people. We have young people, as well as older people.

On the ceiling above Doris is a sign that my dear friend, Courtney, gave me a few years ago. The sign simply says “Create.” This is the creation part of Cajun Stitchery. I cut out paper and play with patterns and designs. There have been some truly weird things created up here, as well as a lot of beautiful things.

While I’m in the Crafting Department, George decided to clean the embroidery room downstairs. Uh oh. Don’t throw out my stuff, dear. He brought up a box of fabric scraps to the Crafting Department. Not having much room left in here, I had him put the box on the floor. Before long, I looked in the box and what do you know, little Polly, the Manx is curled up inside the box, fast asleep. What a precious sight that was! After awhile, I looked over and Tigger, the orange and white Tom cat, had squeezed himself into the box.

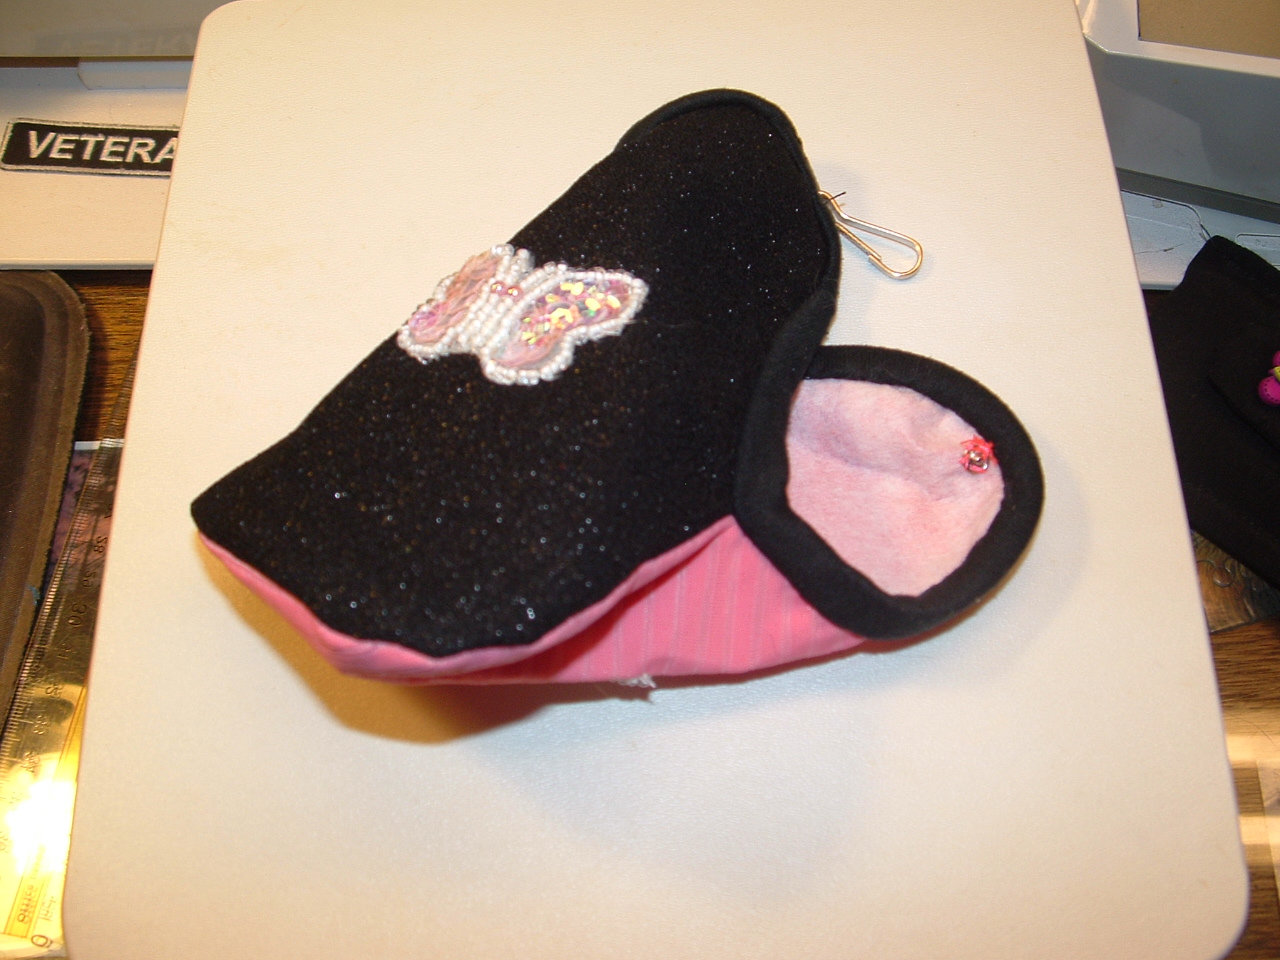
While looking at some templates for the bottle apron, I got the idea of, what would that look like if I sewed the sides and bottom? We now have a new style cell phone pouch. In fact, I listed one last night on Etsy. These are simple pouches. They are not as detailed or ornate as the mermaid pouches, but I like them. These will definitely be an item at the Art & Wine Festival.

My goal, and I suppose the goal of all crafters and seamstresses, is to use all the stuff that I have, down to the mere scraps. Then, envisioning that this could ever happen, I would be out of everything and have to go shopping to replenish with new stuff. That’s what I’m trying to do. This is probably not possible. I’ve been trying to do this all of my life. I just get more and more and more stuff.

One day I was contemplating the birthday of one of my Nereid sisters and an idea popped in my head for a design. This year my Nereids all get pillowcases for their birthdays. Anyway, I digitized the design and earlier this week stitched it out. It is the most beautiful design. Alas, I cannot post pictures on the internet because it’s a surprise and we have not yet celebrated her birthday this year. When we do, I will post these pictures everywhere. It’s just gorgeous.

The Nereids have several birthdays coming up and I need to get busy with designs and ideas. George told me the other day that my Nereids all have beautiful embroidered pillowcases. Customers order and we embroider beautiful embroidered pillowcases. But our pillowcases are threadbare. We need to come up with a Henshall design and embroider something for ourselves. You know the old saying that a mechanic’s car never works and a carpenter’s home is always in disrepair. This embroiderer needs to do something for us.

I found a sign language font. Seriously, I did. We were embroidering some pillowcases for a friend of my Aunt Philo’s and I sent a hand towel with the signs for L and U as the lagniappe. OMG! She was surprised. Now I think she is coming up with a million ideas for sign language embroidery. It’s amazing the things you can find on the internet. I put the photograph of her towel on the Cajun Stitchery Facebook page. I need to post it on the blog.

Last night George and I were outside in the garden, harvesting and tending to the garden. It was just turning dusk and we realized how comfortable it was outside. I think it was the first day this summer that we weren’t seriously attacked by mosquitoes and heat. We sat outside for awhile and realized that fall is approaching and we will be able to sit outside more and more. We love doing that; sitting on the deck with a glass of wine as the sun goes down and just loving the environment. As the temperature cools, we will even light the chiminea. Another of life’s simple pleasures.

Speaking of the garden, we are still harvesting bell peppers, carrots and beans but haven’t even begun our fall planting. I’m thinking onions, broccoli, carrots, lettuce, garlic, and celery. Our tomato plants are still lush and beautiful. As the temperatures cool, maybe we can get some tomatoes. Last year we picked the cherry tomatoes well into December. Sassy still has some fruit and I sure hope it ripens this fall. I’d plant brussel sprouts but they don’t seem to do well for us. Maybe we’ll throw in some cabbage, too. Squash doesn’t seem to work well for us, either, but we did get some cucumbers this year and maybe we should just keep trying.

Until last night, I’ve been a slacker this week with the Etsy store. I need to get back into the swing of at least listing one item a day.

I need to find some ice blue thread. The embroidery room has 5 shades of blue and one of the shades if very close but I’m trying to match at bedspread. So, I ordered a couple of shades of ice blue thread from my usual wholesale thread company. Then I ordered some rose, burgundy, navy, and by the time I was finished I spent more than $100 on embroidery thread. I don’t expect the order to arrive until probably last next week but we are going to have thread coming out of our ying yang.

Speaking of ordering, George has embroidered some beautiful caps for the Arts & Wine Festival and ordered 2 dozen more caps which came in the other day. He will be working on his caps downstairs after he finishes his clean up project in the embroidery room. Then he is going to start working on a Cajun Stitchery banner for our booth at the festival. I cannot wait to see the finished banner.

I embroidered monograms for every letter of the alphabet this week on 2 ½ inch, red ribbon. I was going to make luggage tags with the monograms but, in the end, I didn’t like the luggage tags. I love the monograms on the ribbon but it just looked too big for a luggage tag. Now what am I going to do with the rest of the alphabet?

My son, Hank, wants me to make him a cell phone pouch with the Gators insignia. I explained that I cannot because the insignia is licensed, but I can make him a cell phone pouch with a gator on it, but not the official insignia. That licensing thing seems to be difficult for people to understand. There is a fine line between what I can and cannot embroider.

It is football season and I need to make more fleur de lis and gator items. What is your favorite football team? Let me know and you may just find a variance of the mascot on some of our items.

Christmas is coming and customers are starting to do their Christmas shopping at Cajun Stitchery. Get this out of the way as soon as you can. For all who have businesses out there, remember that we also sell gift baskets.

Always remember that we are just a call or email away at cajunstitchery@yahoo.com or 850-261-2462 and place your order.

ΘΘΘΘΘ

A long time ago, Boudreaux and Thibodeaux decided to go out west. They were in a covered wagon but somehow got separated from the wagon train. Boudreaux was in the front driving while Thibodeaux was relaxing in the back. All of a sudden, Boudreaux heard a yell from Thibodeaux in the back: "Hey, Boudreaux, there's Indians on horses back here chasing us." Boudreaux said, "Thibodeaux, how big are they?" Holding his finger and thumb about 2 inches apart, Thibodeaux said, "Mais, Boudreaux, they only about this big." "That's okay, Thibodeaux," Boudreaux said. "Tell me when dey get bigger." About ten minutes later, Boudreaux yelled out, "Hey, Thibodeaux, how big are those Indians?" "Mais, Boudreaux, dey are about tree feet tall." Boudreaux yelled back, "That's still okay, Thibodeaux, but tell me when dey get bigger." Ten minutes after that, Boudreaux cried out again, "Thibodeaux, how big are those Indians now." "Mais, Boudreaux, dey as big as you and me!!" "Well, shoot 'em!" screamed Boudreaux, "shoot 'em!" "Mais, Boudreaux, I can't," said Thibodeaux, holding his finger and thumb about 2 inches apart. "I've known 'em since they was dis big!"

ΘΘΘΘΘ

French phrase of the week: pain de maïs cornbread. pain perdu French toast.

ΘΘΘΘΘ

From: http://www.home-remedies-for-you.com/remedy/Asthma.html

Wow! There are tons of home remedies for asthma:

Asthma treatment using Honey

Honey is one of the most common home remedies for asthma. It is said that if a jug of honey is held under the nose of an asthma patient and he inhales the air that comes into contact with it, he starts breathing easier and deeper.

Asthma treatment using Figs

Among fruits, figs have proved very valuable in asthma. They give comfort to the patient by draining off the phlegm. Three or four dry figs should be cleaned thoroughly with warm water and soaked overnight.

Asthma treatment using Lemon

Lemon is another fruit found beneficial in the treatment of asthma. The juice of one lemon, diluted in a glass of water and taken with meals, will bring good results

Asthma treatment using Indian Gooseberry

Indian gooseberry has also proved valuable in asthma. Five grams of gooseberry mixed with one tablespoon of honey forms an effective medicinal tonic for the treatment of this disease. It should be taken every morning

Asthma treatment using Bitter Gourd Roots

The roots of the bitter gourd plant have been used in folk medicine for asthma since ancient times. A teaspoon of the root paste, mixed with an equal amount of honey or juice of the holy basil leaves, given once every night for a month, acts as an excellent medicine for this disease.

Asthma treatment using Drumstick Leaves

A soup prepared from drumstick leaves, and taken once daily, has been found beneficial in the treatment of asthma. This soup is prepared by adding a handful of leaves to 180ml of water and boiling it for five minutes. After being allowed to cool, a little salt, pepper, and lime juice may be added to this soup.

Asthma treatment using Ginger

A teaspoon of fresh ginger juice, mixed with a cup of fenugreek decoction and honey to taste, acts as an excellent expectorant in cases of asthma. The decoction of fenugreek can be made by mixing one tablespoon of fenugreek seeds in a cupful of water. This remedy should be taken once in the morning and once in the evening.

Asthma treatment using Garlic

Garlic is another effective home remedy for asthma. Ten garlic cloves, boiled in 30 ml of milk, make an excellent medicine for the early stages of asthma. This mixture should he taken once daily by the patient. Steaming ginger tea with two minced garlic cloves in it, can also help to keep the problem under control, and should be taken in the morning and evening.

Asthma treatment using Bishop's Weed

The herb bishop's weed has been found valuable in asthma. Half a teaspoon of bishop's weed should be mixed in a glass of buttermilk and taken twice daily. It is an effective remedy for relieving difficult expectoration caused by dried-up phlegm. A hot poultice of the seeds should be used for dry fomentation to the chest twice daily. The patient can also inhale steam twice a day from boiling water mixed with carom seeds. It will dilate the bronchial passages.

Asthma treatment using Safflower

Safflower seeds are beneficial in the treatment of bronchial asthma. Half a teaspoon of powder of the dry seeds, mixed with a tablespoon of honey, can be taken once or twice a day in treating this disease. This acts as an expectorant and reduces the spasms by liquefying the tenacious sputum. An infusion of five grams of flowers mixed with one tablespoon of honey, taken once daily, is also useful in this disease.

Please let me know if there is something that you would like to see in the weekly email. You may always call me at (850) 261-2462 or email me at cajunstitchery@yahoo.com.

If you are not a subscriber and would like to receive Cajun Corner weekly, please email cajunstitchery@yahoo.com and let me know to put you on our email list.

C’est tout, mes amis

Peggy Henshall

Cajun Stitchery

(850) 261-2462

cajunstitchery@yahoo.com

P.S. You are always welcome to stop by and look at all of the catalogs and pass some time with me, cher.

SALE OF THE WEEK (Good through Thursday, September 2, 2010)

SALE: Short Sleeve Denim Shirt sizes S-XL with first name or initials embroidered for $25.00

Sierra Pacific - #0211

Short Sleeve Denim

Catalog page: 17

6.5 oz. 100% cotton. Button down collar. Double needle stitching with 2-ply back yoke. Wood-style buttons with spare. Left chest pocket and locker loop. No back pleat.